


Types of graphics
In order to quickly and efficiently deal with importing graphics it is useful to have a basic knowledge of their types.

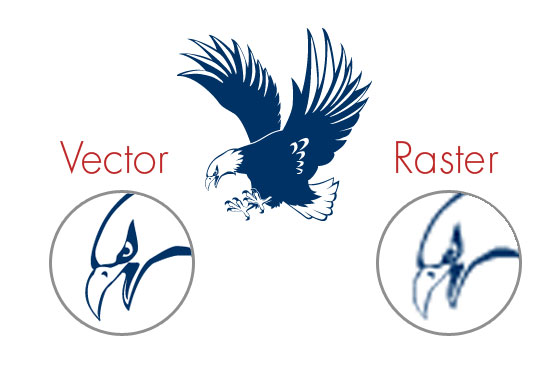
Graphic taken from: http://4.bp.blogspot.com/_CBJsy-gk_JQ/TJfl6hMUOiI/AAAAAAAAADQ/3c9C0MnkbSs/s1600/vector-vs-raster.jpg
Raster graphics
Files with extensions: JPG, PNG, GIF, PSD or TIFF.
Most of the graphics we find on the Internet will be just raster graphics - photos, sketches, coloring pages.
This type of graphics is characterized by the fact that when you enlarge the image over time it will no longer be clear, and you will see small squares - pixels - on the screen. This is due to the way such images are stored - as a grid of pixels with specific dimensions and colors.
Cutting plotters are not able to cut such graphics and it is necessary to convert them into vector graphics.
Fortunately, with the help of Cricut Design Space, among others, this can be done quickly and easily.
Vector graphics
Files with extensions: SVG, PDF, AI or EPS.
These are graphics prepared in programs such as Inkscape (free), Corel, or Illustrator. In the case of such images, you will not notice any loss of quality when enlarging them. Vector files are saved as mathematical functions, which the computer "draws" on the screen.
They are also excellent files for cutting plotters, as they contain a kind of instructions for the device, e.g. draw a straight line of 5cm in length.
Import files into Cricut Design Space - raster graphics
Download any image from the Internet and save it to your computer. We will use this graphic of a cactus.
In the program, go to the Upload tab and select Upload Image.

Use the Browse button to select the downloaded image from the disk.
Choose the type of graphic depending on the image you have. For high-contrast graphics, this will be Simple.

In the next tab for JPG files, remove the background (just like in our tutorial on cutting prints)
For a PNG file, most often you just need to click Continue, since they don't have a background.Then select Save as a Cut image so you can cut this graphic.

Then, in the Recently uploaded images gallery, select the imported graphic and press Insert Images.
It will appear in the work area ready to be cut out on the plotter.
Import files into Cricut Design Space - vector graphics.
Cricut Maker has the ability to import SVG files.
Similar to importing raster files, go to the Upload tab and select Upload Image.
Then give a name to your graphic and press Save.

Then, in the Recently uploaded images gallery, select the imported graphic and press
Insert Images.It will appear in the work area ready to be cut out on the plotter.
Convert raster graphics to SVG file in Inkscape
The free vector graphics program Inkscape allows us to quickly convert JPG, or PNG files into SVG. In Cricut Design Space, removing unnecessary parts of the background can be time-consuming, so it's also worth exploring another (often faster) option.
Open Inkscape and import a graphic into it by dragging it onto the program's workspace. We will use the mandala graphic. Here is a rather complicated pattern, in which manually removing the background would take a lot of time.

Go to Path -> Vectorize bitmape

Click on the graphic in the program and press Update. The preview will show a visualization of the graphic you get.
Using the Threshold value, you can better adjust the outlining of the graphic when it is not high contrast.

A second copy of the graphic, which is a vector, will appear on the screen. Delete the original image leaving only the newly created graphic.

Go into point editing (for example, by double-clicking on the image or selecting the second from the top tool in the left menu) and delete unnecessary points by selecting them and pressing Delete. You can fully change the appearance of your graphic.

Save the image prepared this way as an SVG file and import it into Cricut Design Space according to the previous section of the tutorial.
Share this post with your friends!

Newsletter
Join the newsletter and get a 50 PLN discount*
Get access to inspiration and opportunities prepared especially for subscribers.